Documentation is key in water damage restoration, and taking pictures of the entire affected area can help strengthen your insurance claim. This includes wide shots and close-ups of any damaged items, along with their original value and purchase date. For professional help, contact Water Damage Restoration Utah.
If necessary, drywall and carpeting may need to be removed before the drying process begins. This will allow the drying equipment to more easily reach underlying materials.
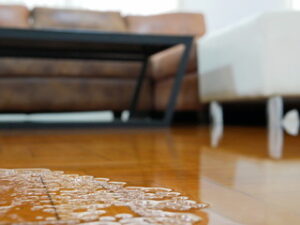
1. Determine the Source of the Water
The first step in water damage restoration is ensuring the safety of everyone in the area. This involves turning off electricity and gas in the affected area so that there is no risk of electrocution or other hazards. It also means identifying the source of the water and evacuating the area as necessary.
This step is especially important for flooded basements or areas with standing water that may contain dangerous bacteria or other contaminants. If the source of the water is not addressed right away, it could lead to serious health issues and structural damage.
Identifying the source of the water often involves checking for visible signs of a leak, such as water stains or damp spots on ceilings and walls. Sometimes, a simple tightening of a faucet or replacement of a washer can fix the problem. In other cases, it may be necessary to replace a valve or install a new pipe.
If the source of the water is clean (Category 1), it may be possible to simply remove the water and continue with the cleanup process. However, if the water is gray or black (Categories 2 or 3), it will require more extensive cleaning and sanitization to avoid health risks. In addition, it will be necessary to remove furniture and other contents from the affected area to prevent further damage. It will also be necessary to ventilate the area by opening windows and using fans to increase airflow.
2. Evacuate the Area
If the water damage is caused by a broken pipe or flood, it is critical to turn off your home’s main water valve. This will prevent the water damage from worsening and ensure that no additional water is added to the property. If you are not sure how to shut off your main water valve, contact your local plumbing company immediately. They will be able to assist you and can help minimize the damage.
Once you have turned off the water and the area has been contained, it is time to start the drying process. The longer the water is left in the property, the more damage it will cause to building materials like drywall and subflooring. It can also lead to the growth of bacteria, mold, and fungus that can pose health risks for your family and pets.
The first step in the drying process is to remove any standing water from the property using an electric pump or wet/dry shop vac. Next, you will need to remove any contents from the affected areas that can be saved and then sort them into salvageable and unsalvageable piles. Items that cannot be saved or restored, such as upholstered furniture, carpeting, paper products, food, and electronics, will need to be disposed of in order to avoid contamination and prevent mold development.
It is important to open windows and use fans to promote ventilation and speed up the drying process. Additionally, you will want to contact your insurance provider and a professional restoration company. They will be able to guide you through the claims process and ensure that all necessary steps are taken to restore your property.
3. Remove All Water
When water infiltrates your home or business, it can weaken building materials, lead to rotting and warping, and encourage the growth of mildew and mold. It’s important to take action quickly to minimize the damage and prevent further issues.
Once the source of the water has been identified and the area has been evacuated, it’s time to start drying out the affected areas. This process may include the use of commercial-grade air movers and dehumidifiers to dry out the affected materials. It can also involve removing carpeting, cutting out drywall, and applying antimicrobial solutions.
A moisture inspection of the area will be performed to identify the type and extent of water damage, the water class (wet porous materials such as carpet, gypsum board, fiber-fill insulation, and textiles; low evaporation materials such as concrete, wood, and masonry) and other details. If any materials can’t be restored, they will be removed as soon as possible to expedite the drying process.
In many cases, the drying process will require that you temporarily relocate to another room in your home or business. This can be inconvenient, but it’s essential to ensure the best results and prevent further damage. Taking these steps can help you avoid structural damage, preserve your belongings, and get back to your normal life as soon as possible. In addition, drying the area and removing all moisture can also help you avoid health risks from bacteria, mold, and other contaminants.
4. Dry the Area
Once the water is removed, it’s time to dry out the area. This is a critical step that can help prevent mold growth and other structural issues. It involves using air movers, dehumidifiers, and other commercial-grade equipment to remove moisture from the air and surfaces.
This process can take a few days, but it’s essential to ensure that the area is completely dry. Failure to do so can lead to additional damage, mold growth, and other health risks for occupants.
The first step is to improve airflow by opening doors and windows. This helps to reduce humidity levels and allow the area to dry more quickly.
You can also use portable fans to provide ventilation in hard-to-reach areas, like closets and cabinets. They are often less expensive than axial or snail blowers and can easily be stacked for transport and storage purposes. Dehumidifiers are another key tool for reducing humidity and eliminating unpleasant odors. They are especially effective in small spaces and can be paired with deodorizers to eradicate mildew and other odors.
Finally, it’s a good idea to check for any hidden damp spots, such as behind walls and in attics. This can help you spot problems before they become serious and save you a lot of money in the long run. If you notice any signs of water damage, contact a local restoration company to address the problem promptly.
5. Sanitize the Area
Once the water is removed and the area has been dried, it’s time to sanitize the area. This will involve using disinfectant to get rid of any bacteria and other contaminants that may have built up in the walls, floors or carpeting. Different disinfectants will require different levels of dilution, so be sure to read the directions on the bottle before applying it.
This step is especially important if you have suffered category two or three water damage, which means that the flood water contained contamination that could cause illness or discomfort if touched or ingested. It’s also a good idea to disinfect the areas that have been affected by sewage back up, because this type of water can carry a wide variety of diseases and parasites.
When sanitizing your property, be sure to wear protective clothing and use proper cleaning techniques. Also, be sure to dispose of any materials that cannot be saved, as this will help prevent mold growth in the future.
Once the sanitizing process is complete, it’s time to restore your property. This will involve repairing any damaged drywall, flooring, or furniture, and may also include replacing these materials if necessary. It’s important to take care of this as soon as possible, as moisture can already be causing more problems behind walls and in other hard-to-reach places. It’s a good idea to hire a professional restoration company for this, as they have the training, equipment, and expertise needed to restore your property quickly and thoroughly.
6. Restore Your Property
Water damage restoration isn’t just about cleaning items, it’s about restoring the property to its original condition. It may involve repairing or replacing damaged materials, such as drywall, flooring, and furniture. It also involves sanitizing and mold testing to ensure the safety of occupants.
To begin the restoration process, a professional inspector will perform a visual inspection of the property and determine what can be saved from the impacted areas. They will then use specialized equipment to dry out the space, including air movers and dehumidifiers. If necessary, they will also remove drywall down to the studs, pull up carpeting, and replace padding. This step is important for preventing further damage and mold growth, as it allows the structure to dry out more efficiently.
In some cases, it may be necessary to apply antimicrobials to prevent the growth of bacteria and mold spores that can cause illness in people and pets. These chemicals kill existing fungus and bacteria, as well as prevent their further growth in the future.
When you experience a flood due to a natural disaster or burst pipes, it’s important to act quickly and call in professionals for water damage cleanup. They can help you identify the source of the water, remove it, and dry out the affected area, ensuring your property is restored to its original state. The faster this is done, the less likely it is that wood will rot and metal will rust.